Part One - Facial Features
/*This blog will be updated whenever i have time, but to help keep it organised, i will post it in parts. Please note that if im going to update something in that part, i will edit the blog, not post a new one*/
Ok, before you start creating your masterpieces there a few basics that i want to show you when you're designing a manga character. A lot of the books i read when i was learning started off with the full body pose etc, which is a bit silly. I am going to start with the most simple manga technique, and for me, the most fun. Facial Features.
We are going to begin with drawing a simple manga eye. Now when you look at manga eyes there are hundreds of different styles. Every artist has his or her way to depict the eye, but there are a few basics you can follow to help you.
Eye Basics
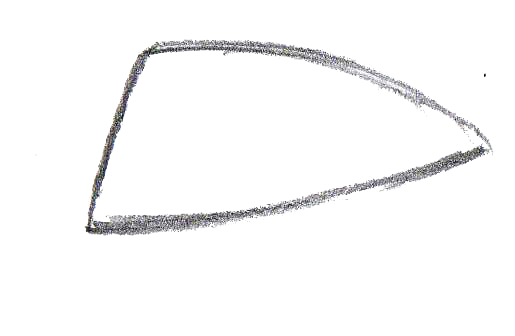
Ok, first things first, the human eye takes on a very basic shape. It only needs three lines to illustrate this, so start by drawing out the following shape.
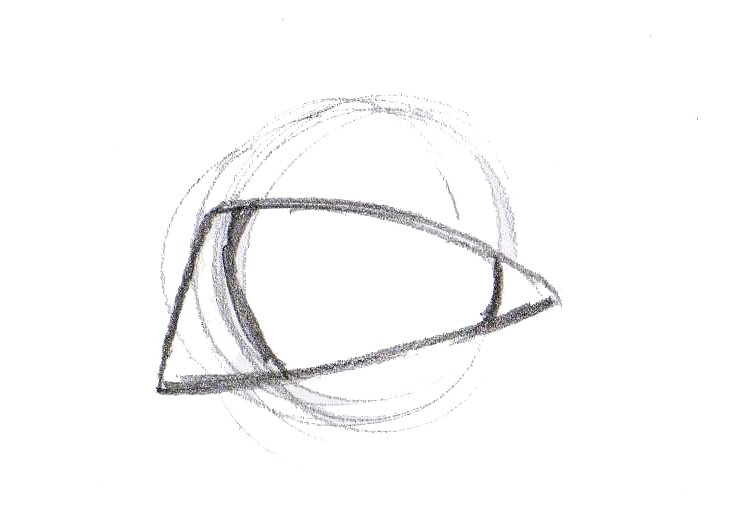
Now to draw the eyeball in the eye. Note the rough guideline i've used around the eye to create a circle. The eyeball should only have part of it showing in the picture, not just a simple round circle (unless you're drawing certain expressions).
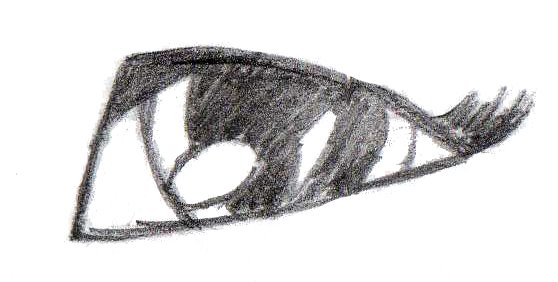
Now we have drawn the outline of the eye, we can simply fill in the detail. You can make the lines thicker on the eye to give it more definition. Add the pupil, then some highlites by simple drawing circles and triangles inside the pupil. The detail is really up to you on how you do it.
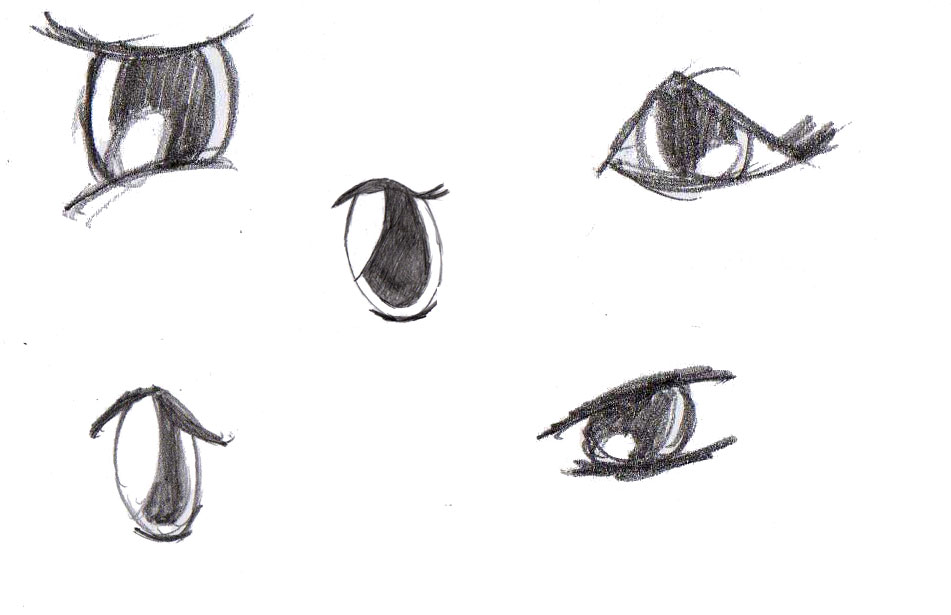
From this basic eye, you can now create any number of eyes for your characters. Just rember the basic shape. Here are a few examples to get you going.
posted by Certix @ 1:49 AM
0 comments
![]()
